There are only really two differences that you will see when using points instead of centerpoints. When you load a polygon, you will need to check the Create Centroid box on the Properties tab in shape2earth in order to create the centerpoints (see below).

If you are using a point shapefile, all of the point options are already visible, and uses have the additonal option to use the colors set in MapWindow to color each point (this option is shown in more detail HERE).
 To change the icon used for a point, click on the icon button next to the Style label (see above). This will open up a form with a selection of different point symbols to use (see below).
Select the point you would like to use and click OK. This will close the Point Selector, and will change the selected symbol in Shape2Earth.
To change the size of the icon, you can change the number next to the Icon text box to the right of the Style point selection (see below).

You can also change the characteristics of the label that will be seen next to the point. You can change both the size and the color (see below).
If you do not want to see the point, but just the text, then change the number next to the Icon label to zero.
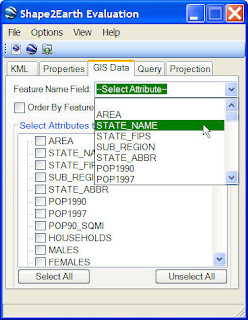
(Note: the text that will be seen next to the point is selected from the Feature Name Field on the GIS Data tab. You can see how to do this at the Basic Importing section, or see a graphic here.

The Create Label Rollover checkbox will open up additional point options. The label rollover is a different icon and label that will be made visible when a user 'hovers' over the point in Google Earth. The options for the label rollover are the same as that for the Style Icon. Though there is one more option to change the color of the icon.
 It is often a good idea to make the Label and Icon larger for the rollover. It also works well to change the Icon and Label Color, as we have done below.
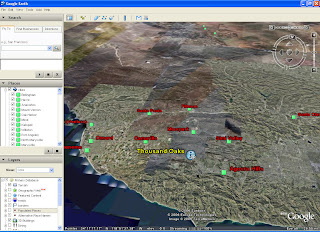
The Google Earth KML below shows how the above settings would work when applied to a point shapefile representing cities. Notice the different icon and color when the user hovers over Thousand Oaks.
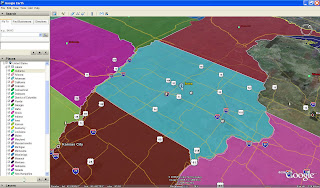
The Google Earth KML below shows how the above settings would work when applied to a polygon shapefile representing States with the centerpoint option selected. Notice the different icon and color when the user hovers over Iowa.
The options for labels and centerpoints can be adjusted and reapplied until a good color combination and Icon set are found for your particular dataset.
1 comment:
It would be wonderful if we could have different icons for different types of points. I found a long work-around that I have to do each time.
I use the Coloring Scheme in the Legend Editor of MapWindow and assign different colors to the points. This creates the styles in the kml.
Then I have to replace the style URLS for each Style id="xxx" with the ones for my icons.
This involves figuring out which id's are for which type of point and mapping that in something like a OneNote table so you can tell which id uses which icon URL.
Pain in the ass but it works. It would be better if the application let us do this.
- jim
Santa Clara, CA
Post a Comment